I’ve really liked my new ASUS ZenFone 5 since I initially took it out of the box. It’s got some nice improvements over the ZenFone 4, particularly when it comes to the cameras.
They’re a little sharper, with a tad more dynamic range, and they really do show off the scene well when I use it to get photos when location scouting.
But I like to shoot DNG RAW with my phones so that I can process them on the desktop rather than on the phone itself. This way, I can quickly batch process them and schedule them on social media using Hootsuite.
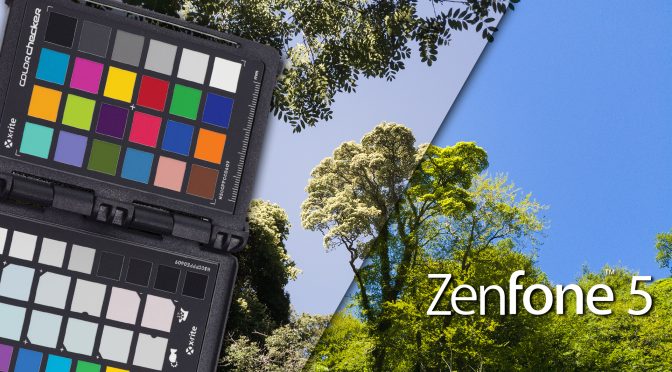
DNG colour from smartphones isn’t perfect, though, which is where the X-Rite ColorChecker Passport steps in. It solves all my DNG colour issues and makes the post work a breeze.
The whole process is detailed in the above video, so I’m not going to go too much into it here in this post. But here’s the basic outline…
- Shoot a RAW photo of the ColorChecker Passport
- Run it through the X-Rite software or Lightroom plugin
- Reload Lightroom or Bridge/ACR
It’s really that simple.
If you don’t own a ColorChecker Passport, you can buy one here if you’re in the USA or here in the UK. And if you don’t want to buy one just to profile your ZenFone 4 or ZenFone 5, then here are all the profiles for both cameras for you to download, install and use with your own phone’s DNG RAW files.
- ASUS ZenFone 4 regular & wide angle camera profiles
- ASUS ZenFone 5 regular & wide angle camera profiles
To install them on Windows, simply copy them to the following folder in your user directory.
\AppData\Roaming\Adobe\CameraRaw\CameraProfiles
For the Mac, I believe it is here, but as I don’t use a Mac, I am unable to confirm. If you think it’s wrong, let me know in the comments below and I’ll fix it.
User Library > Application Support > Adobe > CameraRaw > CameraProfiles
It appears that Skylum Luminar 2018 also just added support for DNG Camera Profiles recently.
So, expect another video in the near future, covering a different colour profiling workflow using the X-Rite standalone application for the ColorChecker and Luminar 2018.