
Every time I mention running ComfyUI in a Docker container on social media, I inevitably get a bunch of people asking me how I do it. There’s no official ComfyUI image, and Docker isn’t even mentioned on the ComfyUI GitHub page. So, here you go…
Basically, I roll my own ComfyUI container. On creation, it downloads the latest version of ComfyUI from GitHub, grabs a few essential custom nodes – at least, I find them essential – along with all their dependencies and wraps it up into a nice little self-contained package.
I’ve released a cleaned-up version of my files on GitHub, so here’s how to set it up on your system.
Why run ComfyUI in Docker?
There are several ways you can run ComfyUI. The two most common are the portable version, that you can just run off a USB stick, or installing it using a Conda environment. Personally, I find it easier to run it in a Docker container.
It offers me two big advantages. The first is that at any point, I can delete the container, recreate it and I’ve got a clean installation without having to sift through deleting files and uninstalling Python libraries or resetting environments.
So, if I want to test out a bunch of custom nodes to see what they’re like and then decide they’re not for me and not giving me what I want, it’s no problem. Just delete the container, build a new one, and I’m back to a clean start.
The second is that because we’re building the image ourselves, we can control the setup exactly. Any custom nodes I want to keep, I can add those to the setup so they’re installed by default every time I want to remake the container.
And, because we’re downloading them fresh every time, each time we make a new container, it’s automatically getting the latest versions available on GitHub.
For others, the portable or Conda environment setup might work better, but for me, Docker makes it simple to maintain.
Step 1 – The Prerequisites
I usually use Portainer to run all my Docker containers, because it lets me administer multiple systems, both local and remote, from a single local UI. I might add Portainer instructions for ComfyUI in the future if enough people want them, but for now, we’re going to focus on standard Docker.
So, here goes…
Docker for Windows users
You’ll need to install some form of Docker. Personally, I find Docker Desktop to be the most hassle-free solution for Windows. Even though it comes with a GUI app, you can still access all of the regular Docker commands from the command line.
You’ll want to make sure to install WSL2 (Windows Subsystem for Linux), too, as it essentially runs Python inside a Linux environment. You don’t need to install a full Linux distro, just WSL2.
Docker for Linux users
For Linux, just install regular Docker system-wide. I tried to use Docker Desktop on Ubuntu Desktop 24.04, but it just wasn’t happening. Because Docker Desktop is installed as the user and not as root, it makes things difficult when it comes to permissions.
NVIDIA Container Toolkit for Linux users
Linux users will need to download the NVIDIA Container Toolkit. Windows users only need the latest NVIDIA drivers for Windows with WSL2 support.
Git for Both
You’ll also need to install GitHub. Many (but not all) Linux distros come with this pre-installed, but Windows users will need to install it. You can find instructions for installing on both platforms on the Git website.
Step 2 – Cloning the Repo
Cloning the repo is just like cloning any other. Make a folder somewhere on your system, bring up a command prompt…
git clone https://github.com/Kaouthia/ComfyUI-Docker.git
cd ComfyUI-Docker
Congratulations, you’ve cloned the repo. Now, you’ll need to do a little configuration
Step 3 – Setting up your folders
There are four persistent folders in this container. These allow you to keep your settings, workflows, models and output, even if you delete and recreate your container. These files are defined inside the docker-compose.yml file, and look like this.
    volumes:
      # persist your models, output, and settings:
      - c:/home/user/comfyui/models:/app/ComfyUI/models

      # persist your output images:
      - c:/home/user/comfyui/output:/app/ComfyUI/output

      # persist all your settings & extra nodes:
      - c:/home/user/comfyui/settings:/app/ComfyUI/user/default:rw

      # persist just your saved flows (overrides the workflows/ in default):
      - c:/home/user/comfyui/flows:/app/ComfyUI/user/default/workflows:rw
You’ll need to determine where you want to create each of these folders on your host system so that they’re easily accessible to you. I went with mounted volumes rather than named volumes so that they’re easily accessible to your operating system outside of ComfyUI if you ever need to access them.
Once you’ve made your desired folders, you’ll want to update docker-compose.yml to point to these folders instead of the defaults.
Step 4 – Build and run the stack!
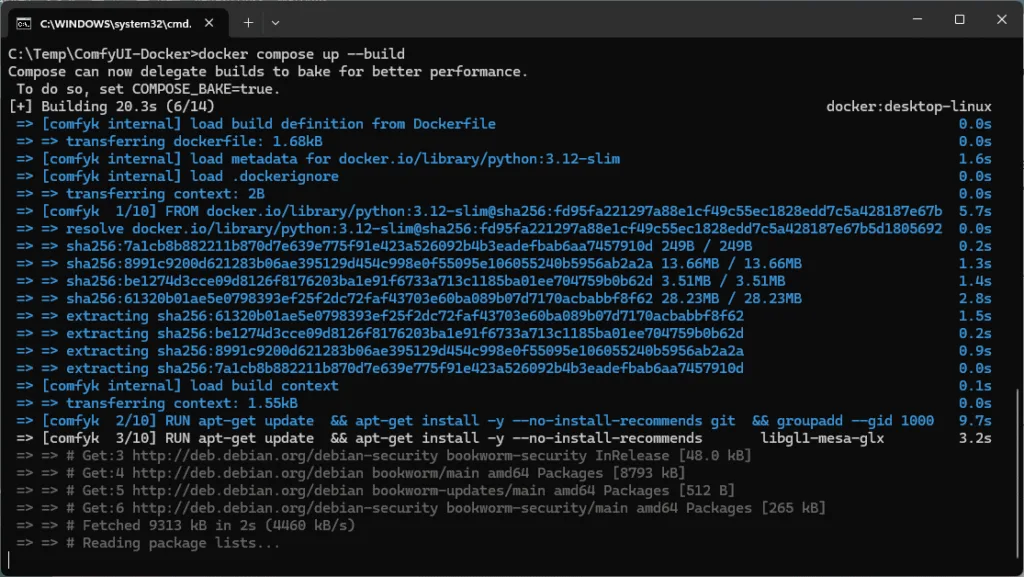
Once you’ve got your folders made and configured, it’s time to build. This is just a single command. In a command prompt, go into the folder where you cloned the ComfyUI-Docker repo and run…
docker compose build --no-cache
docker compose up -d
And that’s it. Well, it is after a few minutes of waiting. Building the ComfyUI image downloads the latest version of ComfyUI and all of its dependencies. This results in about a 10GB file. So, it takes a little time.
Upon creation and first run, it then goes on to download the custom nodes specified in the entrypoint.sh file. These are only downloaded on the first run. So, if you want to update them, you’ll need to do so through ComfyUI Manager or by rebuilding the container from scratch.
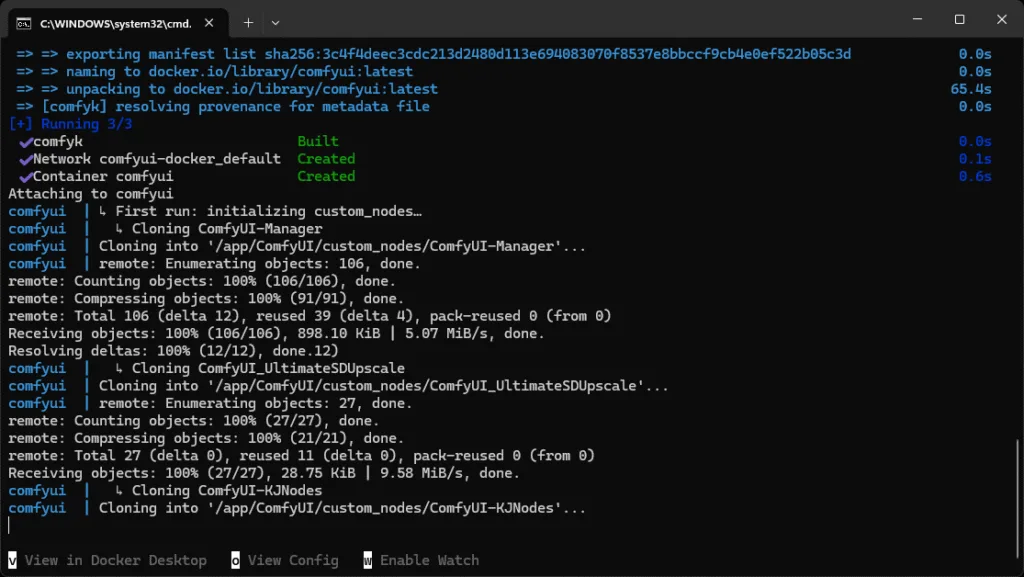
Upon completion of installation and the first run, you’ll be presented with the line telling you that…
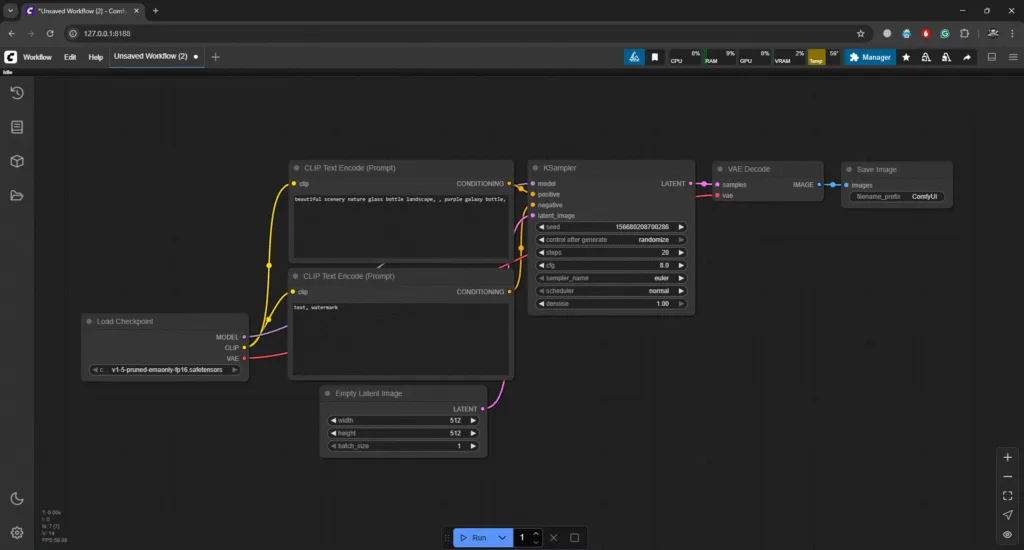
To see the GUI go to: http://0.0.0.0:8188You won’t actually be able to see it at that URL, because it doesn’t exist, but you will be able to get to it on http://127.0.0.1:8188/ or http://[your LAN IP address]:8188/ across your network.
Some notes
If you need to rebuild it…
Ensure that each time you rebuild it, you’re rebuilding it from the latest files and Docker isn’t reusing old remnants. Run these inside the folder where you downloaded the repo. This will take down the container, delete the image and any build files, and thhen rebuild it.
docker compose down
docker compose rm -f
docker image rm comfyui:latest
docker builder prune -af
docker compose build --no-cache
docker compose up -d
ComfyUI Manager & Custom Nodes
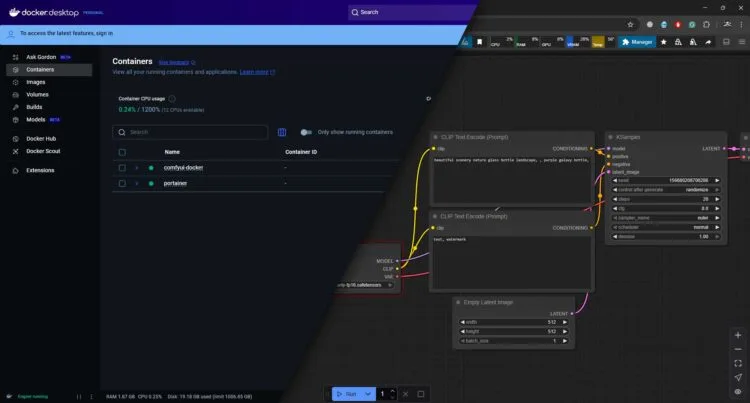
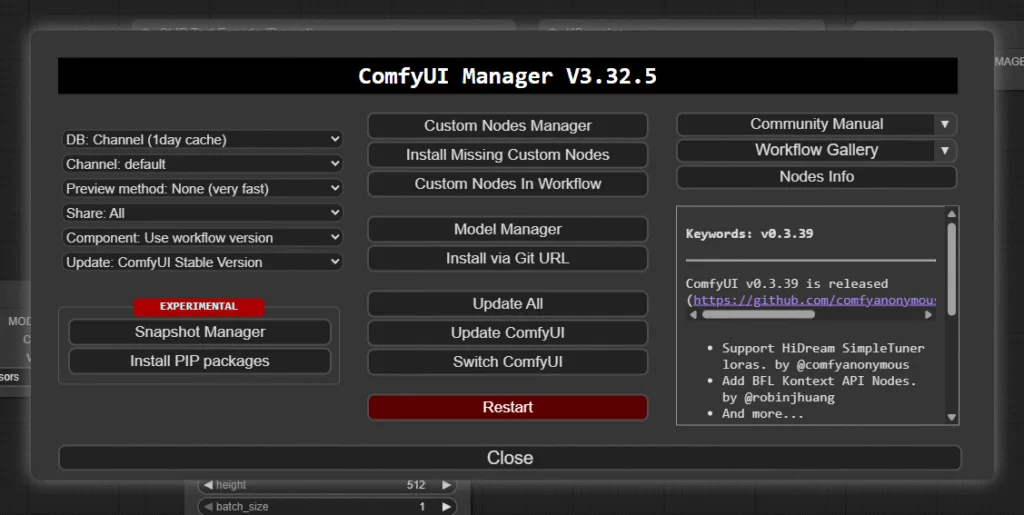
From here, you can do all the things you’d usually do in ComfyUI, such as installing custom nodes or models, or performing updates – most of which can be done through ComfyUI Manager.
Anything you do within ComfyUI will persist for as long as the container exists. You can stop and restart the container as often as you like and it’ll remember what you’ve updated and installed. But, if you delete the container and remake it, any changes you’ve made through ComfyUI Manager will be lost.
This works great because it means you can experiment with custom nodes without risking your entire build. You can download through the ComfyUI manager, and if the custom nodes don’t work or conflict with other nodes, you can just recreate your container and you’ve got no random leftover files in your system.
And if you do want a custom node permanently added to future container builds, you can just add it to entrypoint.sh.
declare -A REPOS=(
  ["ComfyUI-Manager"]="https://github.com/ltdrdata/ComfyUI-Manager.git"
  ["ComfyUI_essentials"]="https://github.com/cubiq/ComfyUI_essentials.git"
  ["ComfyUI-Crystools"]="https://github.com/crystian/ComfyUI-Crystools.git"
  ["rgthree-comfy"]="https://github.com/rgthree/rgthree-comfy.git"
  ["ComfyUI-KJNodes"]="https://github.com/kijai/ComfyUI-KJNodes.git"
  ["ComfyUI_UltimateSDUpscale"]="https://github.com/ssitu/ComfyUI_UltimateSDUpscale.git"
)
The first part of each line is the folder name for the custom node, and the second part is the GitHub URL to clone into that folder. Once you’ve added your desired custom nodes here, when you rebuild the container, they’ll automatically be downloaded, along with their dependencies.
Note to Windows users: Make sure you save the file with LF line endings, and not CRLF, or the Linux OS running inside the container won’t understand it – see the next bit for more info.
CRLF (\r\n) vs LF (\n)
Windows and Linux use different line endings in text files. Windows uses CRLF (Carriage Return and Line Feed, or \r\n), whereas Linux just uses LF (Line Feed or \n). If you build and run the container and see the following message…
comfyui  | /usr/bin/env: ‘bash\r’: No such file or directory
comfyui  | /usr/bin/env: use -[v]S to pass options in shebang lines
comfyui exited with code 127
It’s because you’re editing the entrypoint.sh file in a Windows editor that puts \r\n on the end of each line, instead of just \n. You can easily confirm this by loading the file up in Visual Studio Code. At the bottom right, it’ll tell you if the file is using CRLF or LF.
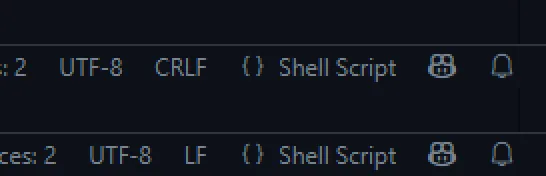
If it’s using CRLF, just click it, switch it to LF, resave the file and then rebuild the container. This should solve the issue for you.
HTTPS vs HTTP
If you’re exposing it across your network and you want to use HTTPS rather than HTTP, there are instructions on the ComfyUI GitHub page. Personally, I find it easier not to expose port 8188 to the LAN and run a reverse proxy through Apache, but this is outside the scope of this article. I might do a future post on this topic, though.
And that’s it.
You should now be up and running with ComfyUI. If you have any issues with the GitHub repo or any of the instructions above, let me know in the comments, and I’ll see what I can do.
Frequently Asked Questions
ComfyUI is a powerful, modular workflow interface for generating images using Stable Diffusion and similar AI models. It allows users to build, modify, and execute complex AI image generation pipelines through a visual, node-based system
Yes, ComfyUI is open source and entirely free to self-host. It operates under the GPLv3 license, allowing users to download, modify, and use it without cost. This makes it accessible for both hobbyists and professionals interested in AI image generation.
There are MANY tutorials on YouTube, but if you’re looking for something to get you started, this tutorial from AI Search is a great video to get you up and running. Another great place for ComfyUI tutorials (probably the best) is Pixaroma, so be sure to give him a subscribe.

Worked great on cachyos.. Thanks for setting this up.
No problem, glad it helped! 🙂
Hi, when ever trying to install custom-nodes getting error:
error: Failed to install: comfyui_frontend_package-1.42.8-py3-none-any.whl (comfyui-frontend-package==1.42.8)
Caused by: Failed to create directory `/usr/local/lib/python3.12/site-packages/comfyui_frontend_package`
Caused by: failed to create directory `/usr/local/lib/python3.12/site-packages/comfyui_frontend_package`: Permission denied (os error 13)
–im using windows.
Many thanks, good clear instructions. Much appreciated
I really like this comfyui setup but unlike my previous setup I am not sure where to put the flux files and safe tensors? I used to just put them in a directory but now I don’t know where to add the files for flux and other models. Sorry if this a dump question.
I have the same issue!
You just put them in whichever folders you’ve mounted in the Docker container. Everything stays inside the container except those folders. That way, you can easily access the important stuff on the host system and keep it between rebuilds. So, it’s whatever folders you use here. 🙂
volumes:
# persist your models, output, and settings:
– c:/home/user/comfyui/models:/app/ComfyUI/models
# persist your output images:
– c:/home/user/comfyui/output:/app/ComfyUI/output
# persist all your settings & extra nodes:
– c:/home/user/comfyui/settings:/app/ComfyUI/user/default:rw
# persist just your saved flows (overrides the workflows/ in default):
– c:/home/user/comfyui/flows:/app/ComfyUI/user/default/workflows:rw
It fails on ubuntu:
/usr/local/lib/python3.12/site-packages/torch/cuda/__init__.py:63: FutureWarning: The pynvml package is deprecated. Please install nvidia-ml-py instead. If you did not install pynvml directly, please report this to the maintainers of the package that installed pynvml for you.
import pynvml # type: ignore[import]
Traceback (most recent call last):
File “/app/ComfyUI/main.py”, line 147, in
import comfy.utils
File “/app/ComfyUI/comfy/utils.py”, line 30, in
from einops import rearrange
ModuleNotFoundError: No module named ‘einops’
I’ll have a look into it. Which version of Ubuntu are you on?
I’m a big Ubuntu guy and I love using it for everything because of the flexibility and endless capabilities.
To run Docker images in Ubuntu, you’ll need to add your user to the Docker group. Use this command and it should fix all the issues you’re seeing.
sudo usermod -aG docker $USER
Then, either reboot, logout and log back in or use the command:
newgrp docker
I hope this helps!
When doing a build I get a permission error:
error: Failed to install: comfyui_frontend_package-1.26.13-py3-none-any.whl (comfyui-frontend-package==1.26.13)
Caused by: failed to create directory `/usr/local/lib/python3.12/site-packages/comfyui_frontend_package`: Permission denied (os error 13)
Someone else mentioned a permissions issue on GitHub, when using the Custom Node Manager, too. I’m looking into it, but I’m not sure why it’s popping up. I haven’t had that issue on three different systems here.
This has been resolved. It was a default configuration issue with the latest version of ComfyUI Manager. The v1.0.2 release fixes it. 🙂
I would love it if you would look at “Issue when trying to rerun the Docker compose #6”
It looks like a local error. I’d just try again or reboot completely if DNS keeps failing. There’s no way the container can affect DNS at creation time like this. So it’s something in the host failing to resolve it.