

During my talk for Lancaster Photographic Society recently, I was asked a question that I’m also going to answer here. I’m paraphrasing, but it went something along the lines of…
“Is getting the right exposure in camera really all that important? Can’t we just nudge it in Photoshop?”
Before I start, I want to clarify a definition here, and a difference between “right” and “technically correct”. It is perfectly possible to make an exposure that is “right”, but not “technically correct” when you shoot with your post processing in mind in order to maximise the capabilities of your camera’s sensor.
Sometimes intentionally over or underexposing slightly allows you to capture the scene and process it in a way that gives a better final result than if you’d started off with a “technically correct” exposure. So, sometimes “technically correct” isn’t the same as “right”.
But to answer to the question, the short answer is “You can, but if you don’t have to, why would you?”.
There is no doubt that Photoshop, Lightroom, and countless other applications allow us to compensate for our photographic apathy or ineptitude after the fact, and it does it fairly competently, to boot.
Say you happen to be out and about in town with your camera and wander across a scene that catches you by surprise, perhaps you see your favourite celebrity walking down the street and you just have to grab a shot – a one-shot opportunity that can’t be repeated.
Sometimes, very occasionally, you just have to react with whatever settings your camera happens to be on, or make an educated best guess judgement based on past experience that allows you to get “close enough”. You just have to react. If you don’t, you miss it.
Perhaps you do have the time to setup and you create a test shot to check your exposure or flash levels. While the technical aspects of the shot may not be perfect, you just love the photograph.
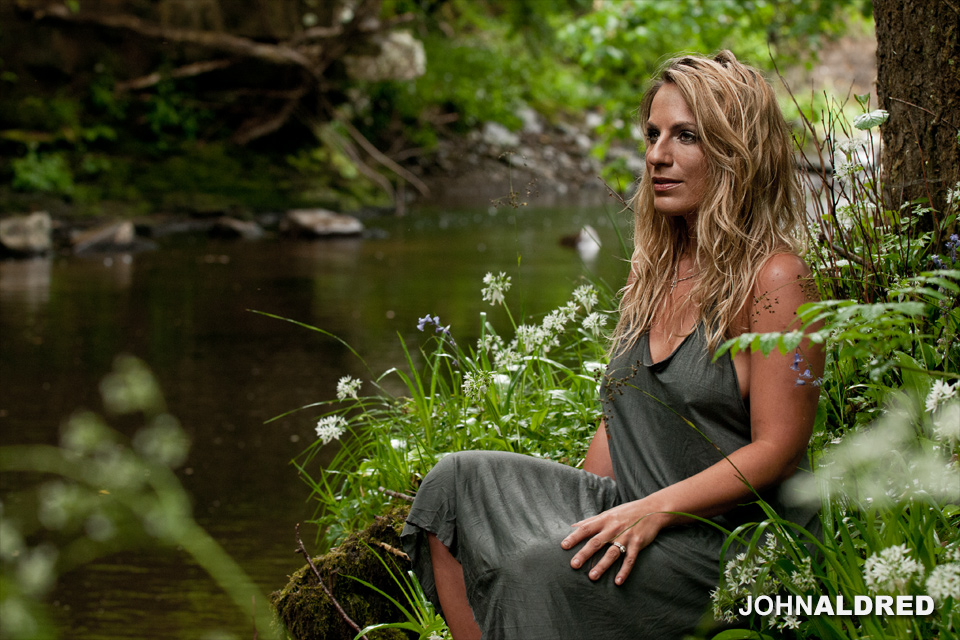
Below is such a photograph. It was actually about 2/3rds of a stop underexposed, as it was simply a test shot while I was figuring out the exposure I needed for the actual session. It was never intended to be part of the set and in fact wasn’t even noticed until we were reviewing all the images after the shoot on the iPad, but we both liked it so I did what I could to correct it in post.
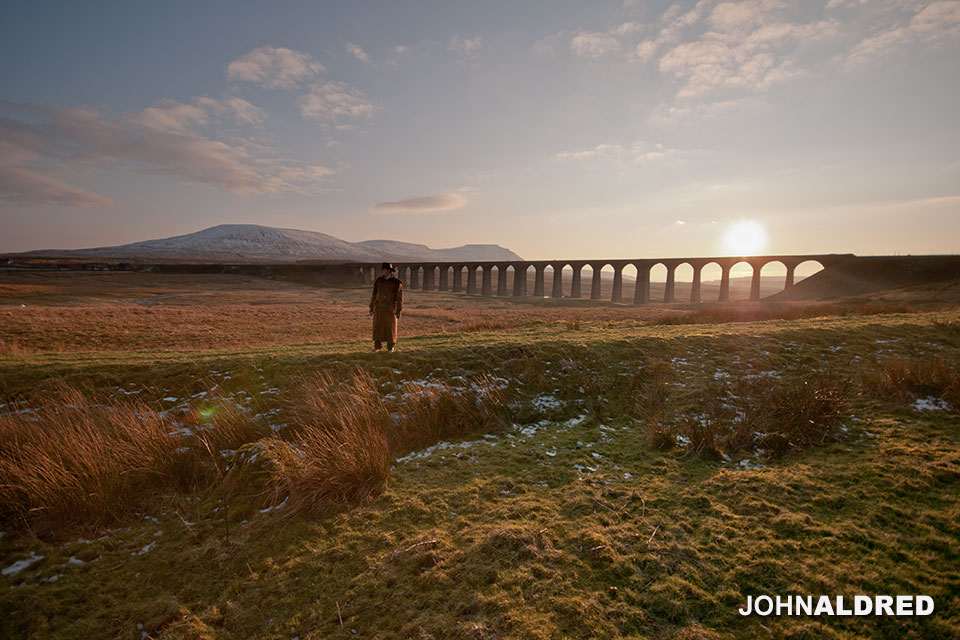
Perhaps you’re out doing some location scouting and a scene presents itself to you that you just have to shoot, but you didn’t bring your ND Grads with you. So, you need to underexpose in order to retain sky detail, and then boost the ground in post.
The difference here is that you’re doing it intentionally, with a little more forethought about what you want to do in post, knowing the ground will be underexposed, rather than “rescuing” an image you screwed up (this goes back to what I said up top about the difference between “right” and “technically correct” – although there are limits).
In such instances, you don’t really have much choice but to attempt to compensate for this in Lightroom, Adobe Camera RAW, Photoshop, or whatever your image processing application of choice.
This is nothing new, it happened in the film days. If you overexposed your shot slightly, you get a darker negative, so you just increase the time the film spent in the enlarger when making your print. If you underexposed, you get a brighter negative, so you reduce the time in the enlarger, and with a bit of dodging and burning you could recover your photo and make it look pretty close to your original intention, had you managed to get it in-camera.
Don’t kid yourselves, folks have been able to do this (and have been doing this) for decades. In fact, with black & white film, you often have far more latitude to correct for exposure issues than we do with digital.
Does that mean you shouldn’t care? Does it mean you shouldn’t try to get it as right in the camera as possible at the time you make your photograph? Should you throw out all your graduated neutral density filters because you can just bump the ground to match the sky in post?
Absolutely not! Even with film, just because they could doesn’t mean that they did. Creating an accurate exposure from the start is virtually always going to give you the best possible final result.
The main difference between film and digital in respect to correcting exposure issues is noise vs grain. With film, your grain is even across your entire exposure. In the highlights, the midtones and the shadows, there’s grain.
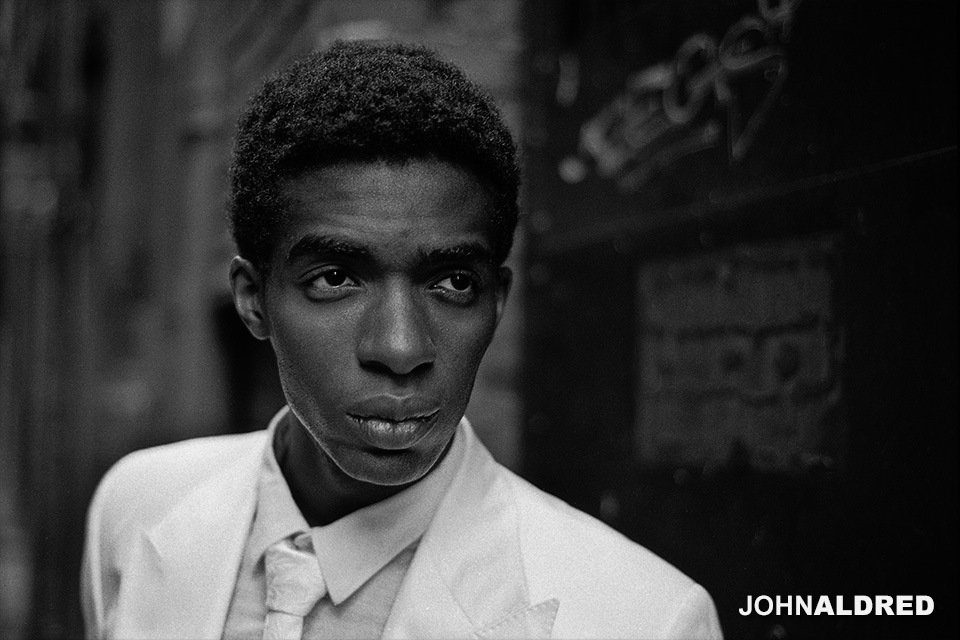
This was a correctly exposed shot on Ilford FP4+ black & white film, and you can see that throughout the entire brightness range of the image from almost pure black to almost pure white, there is grain and it’s spread evenly throughout the tones.
Even if we take a slightly underexposed film shot, and give it some extra time in the enlarger, it still feels right, because the grain is evenly spread across the entire brightness range of the image. The grain across the entire image gets bumped up along with the actual brightness levels of the shot.

Rightly or wrongly, film grain is something our brains have just become accustomed to seeing as “natural” in a photograph, and we’re used to seeing images that way – because it’s what we’ve been exposed to since birth.
With digital, however, we don’t get grain, we get noise, and it is more pronounced in the shadows than it is in the well exposed midtones, and bright highlights of an image, and depending on your ISO and the camera used noise may be completely non-existent in your midtones and highlights, making it obvious where far-too-dark areas have been brightened up.
Our brains have not yet become used to seeing digital noise in only a part of an image (perhaps in a couple of generations this will change – unless technology rapidly evolves to the point where we can shoot images that are completely free of noise even in the darkest shadows).
If we accidentally (or intentionally) underexpose a digital image and want to raise it up in post, while we are brightening up and amplifying the colour information, we are also amplifying the noise, and making its appearance more obvious.
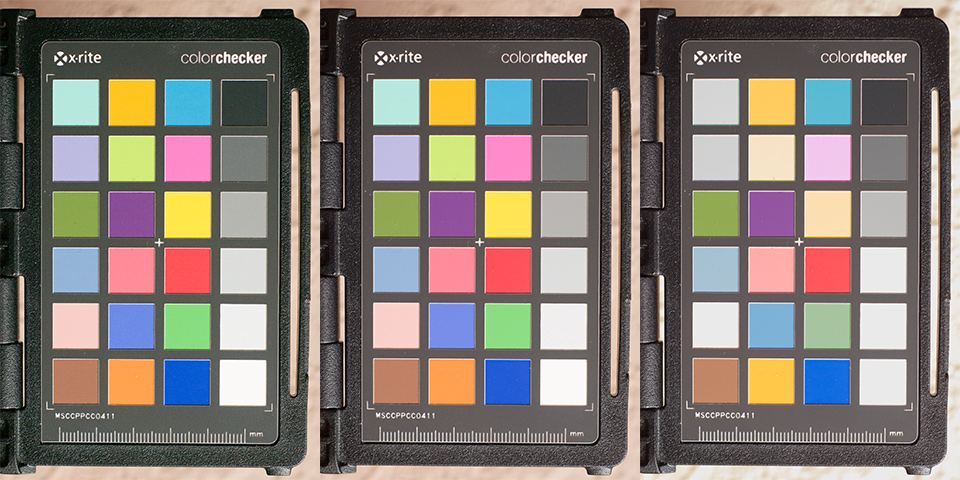
As an example, the following three photographs of a ColorChecker Passport were taken in order to calibrate my Sekonic L-758DR light meter. The software specifically requests that you take one photograph at whatever reading the meter gave you, one three stops overexposed, and one three stops underexposed in order for it to determine the dynamic range of your camera.
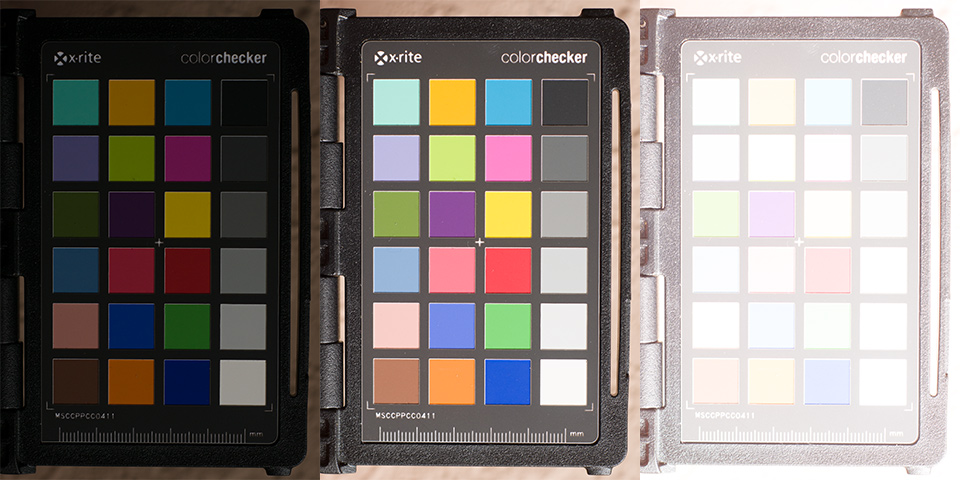
As you can see, the difference is quite striking. But what happens when we dial the image on the left up 3 stops, and the image on the right down 3 stops in Adobe Camera RAW?
Other than the very brightest blown out highlights, they actually look pretty close, right? Let’s look a little closer.
This is the intersection between the four colour swatches in the top left hand corner.

Even without clicking the image above to view it at 100%, you can see the obvious difference between the overexposed shot on the right and the other two. The colours are far less vibrant.
The difference between the underexposed shot on the left and the others is a little less obvious until you bring it up at 100%, at which point the noise in the darker grey area of the shot becomes very visible, and it’s starting to creep into the lighter coloured areas too.
Now, I know some of you are going to be sitting there screaming “PIXEL PEEPER!”, and I don’t care if you do. You can work whichever way you want to, it doesn’t affect me or what I do one way or the other.
In the second set of images of the ColorChecker Passport, you can see that correcting for exposure by up to a couple of stops on a web sized image isn’t really that big of a deal (visually speaking). The noise in the underexposed image just really isn’t visible, and the desaturated colours in the overexposed image can also be corrected with a bit of effort in Photoshop (using hue/saturation adjustment layers and lots of masking).
People rarely post 100% crops to the web as a final image, so then why do I believe it so important to get it right at the point of capture?
For me, there’s three main reasons.
Firstly, even if I know I’m going to be doing a lot of post processing to the image, it means I have the best possible starting point that I can have. An image that is well exposed will mean I have as little noise as possible throughout my image, and the colours will be as accurate as they can be.
The second reason is that when I hit the shutter, I simply don’t know what the image is going to be used for a lot of the time. It may end up simply existing on the web, but it may equally turn into a 4ft print (and I’ve printed my work up to as large as 7ft x 5ft before now).
At these kinds of sizes, or even on something as relatively small as an 18″x12″ print, the shadow noise can become an obvious distraction.
There are solutions for dealing with the noise, and have been for years. Back when I was shooting a pair of Nikon D100 bodies (where every ISO had noise), Noise Ninja was a godsend, but these days, I don’t even have it installed on my computer any more.
This brings me onto the third reason. If you have the few seconds it takes to adjust your settings and grab another shot, why wouldn’t you? What can be fixed perfectly in a few seconds at the point of capture may potentially take hours to “fix in photoshop”.
Why make extra work for yourself?


