
I’ve talked about some of the pros & cons of the Eye-Fi card before, but on location these days, it’s something I find difficult to live without.
It’s a luxury, not a necessity, but it does allow me to speed up productivity and waste less time on a location shoot wondering whether the image I just shot is adequately sharp, if I’ve hit the correct point of focus (the camera LCD is just too unreliable – especially when you need to manually focus), or just to see the overall composition on a larger screen.
It still surprises me how many images I dismiss on the camera LCD that look great when they’re up on a big screen or in print.
The opposite effect doesn’t surprise me, and can be disappointing and annoying. How many times have we got home, brought an image up on the monitor and noticed something in a photo that we could’ve fixed on set before we hit the shutter?
This post basically details how you’d configure an Eye-Fi card to log onto a WiFi network – the one we setup in an earlier post – and automatically send files to an iPad.
If you read the previous article on the TP-Link TL-WR702N (and if you haven’t, click the link in the previous paragraph), this is the follow-up for those who either have an Eye-Fi card or are looking to get one.
I setup my Eye-Fi card a year or so ago on another router to use while shooting events. When I rebuilt my PC a few months ago, I didn’t even bother reinstalling the Eye-Fi software, so some of these screenshots might appear slightly different to yours.
After installing the current version of the Eye-Fi Center from Sandisk’s website, this is the image I was greeted with upon firing it up.

Sure, why not?

Groovy!
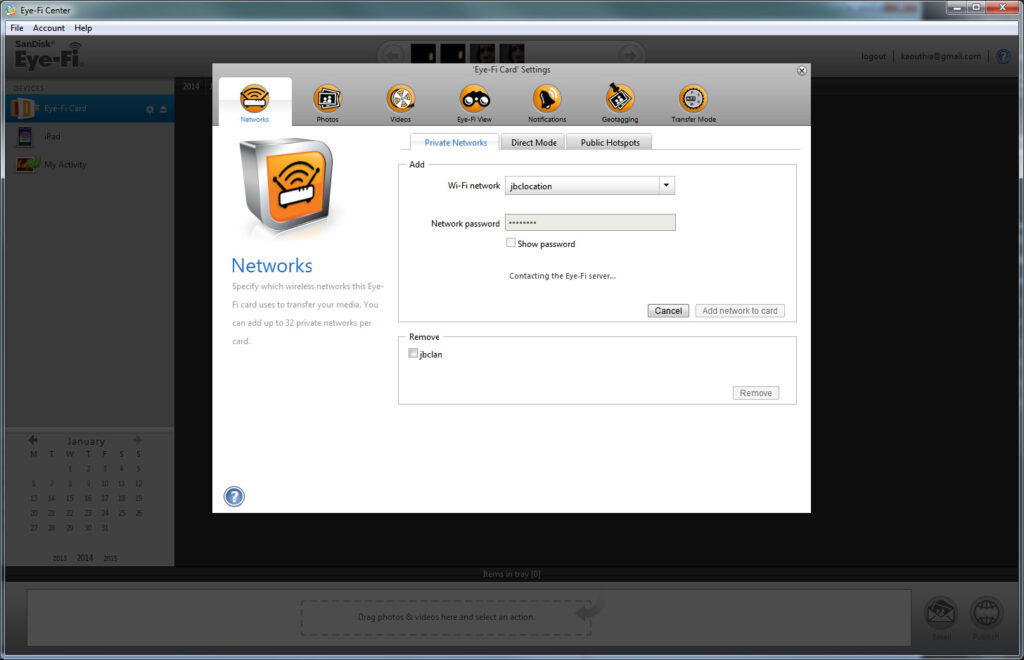
Now we can get on with configuring it. The first thing we want to do is to add our new WiFi network. Remember, this network MUST be connected to the Internet, or it will not work.
You will also need to ensure that you have enabled the DHCP server on your TL-WR702N. You will want to limit the range of IP addresses it can allocate in order to prevent it from conflicting with any devices where you have set a static IP address.
“jbclan” is already configured on the card, as it has been for a year or so. This is my home network. The network we’re going to add here is “jbclocation”.

We’re then confronted with a prompt to enter our WiFi password, which we then enter, and click “Add network to card”.

This image is the reason why we need to be connected to the Internet. The software connects to the Eye-Fi server in order to save your settings.
After about 10-15 seconds, it should add your network.
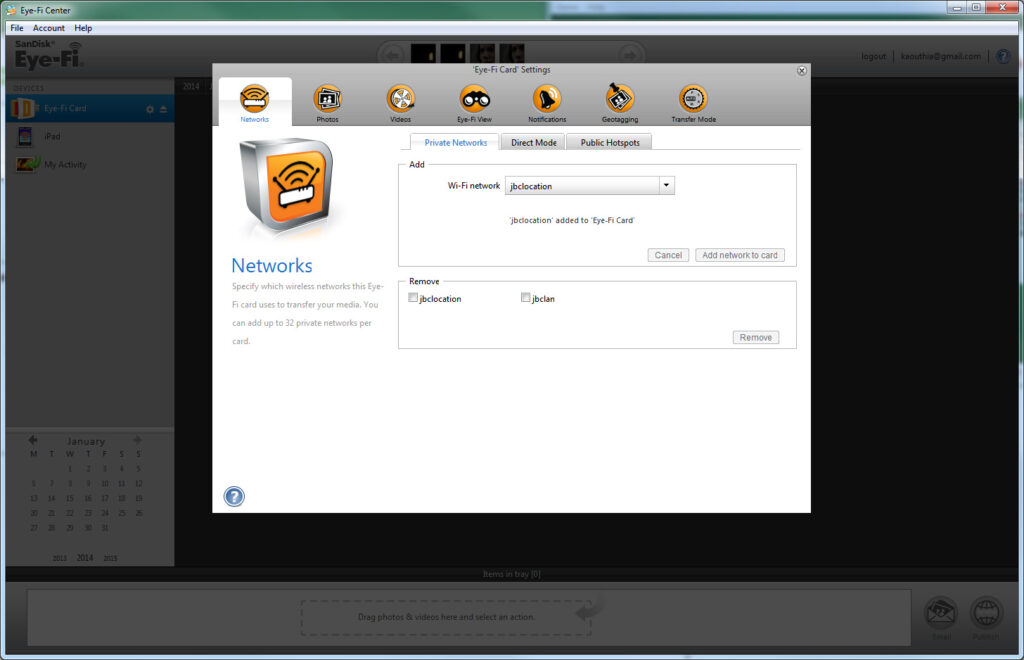
Your card is now configured.
At this point, you’re all set (assuming you’ve installed the iPad Eye-Fi software). You can take your camera, card, router and an iPad out on location.
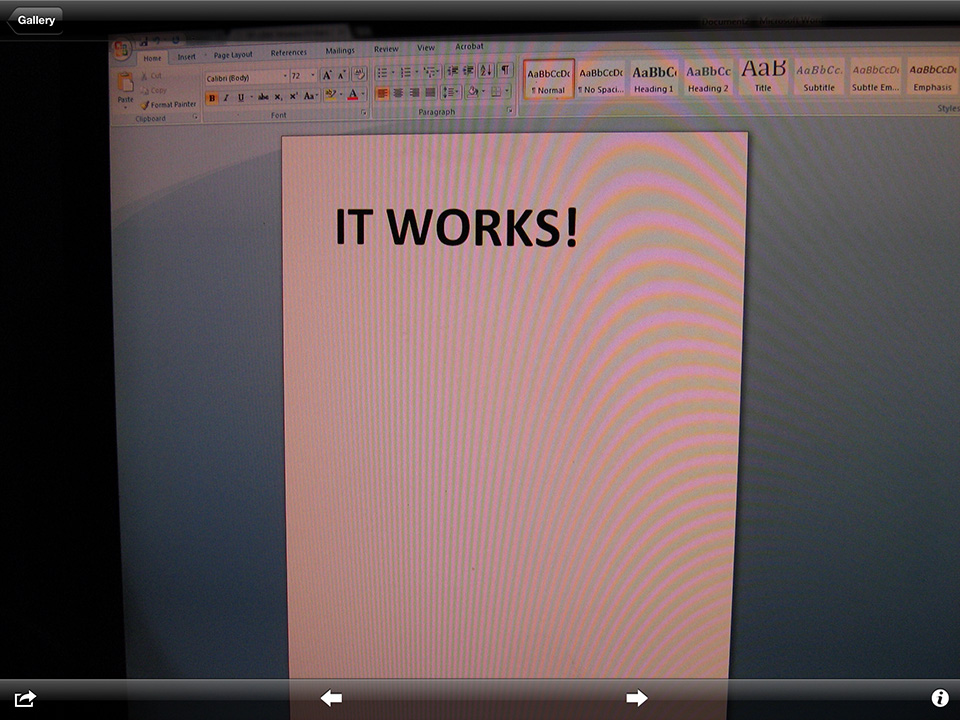
As a quick test, I threw the card in a little Canon Powershot A460 that just happened to be handy.

Immediately after it copied, it came up full screen.
As this is a new router, I’ll be giving it a test during tomorrow’s workshop (but I’ll be taking along its predecessor, too, just as a backup).
It’s after “tomorrow’s workshop” now, and it behaved flawlessly. I kept a 12000mAh USB battery and the TL-WR702N in my pocket, photographed my subject all over the venue, and the images came up on the iPad a few seconds after each shot, which then went up on the TV via HDMI cable.
If you’re not planning to carry a router around with you, but still want to be able to shoot to an iPad or other device on location, this is how you’ll want to configure your Eye-Fi card in Direct Mode for minimum fuss while shooting.

Be warned that using Direct Mode in this way this will drain your camera’s battery much faster than it would normally, and your range will likely be quite limited, but it does eliminate a lot of connection issues.